quality cloth ruler. Check it carefully for accuracy before proceeding.
22. Boot MacWorks or MacWorks Plus. Measure the screen size. Don't be surprised if you have to turn both controls fully counterclockwise (to approximately 8 o'clock). The final raster should measure exactly 8.44 inches in width and 5.99 inches in height. If it's substantially larger than that, shut down the Lisa /XL and remove the power cord . Pull the card cage, observe the metal chassis and find the L3 (coarse width) access hole. As shown in Figure 33, L3 is located below the alignment pots and has to be tuned from the back side of the board. Insert a plastic hexagonal alignment tool through the access hole and turn L3 counterclockwise (in), one full turn. That should do it. Reinstall the card cage, reboot, and repeat the HEIGHT and WIDTH adjustments for best linearity.
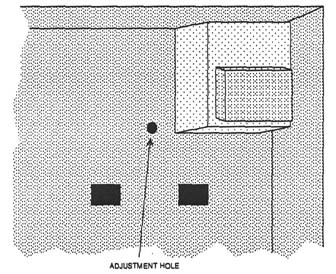
Figure 33 L3, the coarse width control, is located below the alignment pots and has to be tuned from the back side of the board.
23. With a draw or paint program try drawing true squares and circles. Circles should be nice and round and not egg shaped. squares should be square. The display should also be square to the frame. If any of these conditions exist continue with step 24. If not, skip to step 28.
24. If the raster is intolerably off -center or tilted, shut down the Lisa/XL and remove the power cord. Remove jewelry, put on goggles, etc., and discharge the picture tube again.
25. Refer to Figure 12. Remove the sealant from the purity rings at the neck of the CRT until both rings move freely.
26. Refer to Figure 9-2. In the event the raster was also tilted, loosen the yoke retainer as well,
27. Plug in the Lisa and, while exercising all precautions, adjust, the purity rings using just one hand, until the raster is centered on the screen. Next, adjust the yoke, if necessary, until the raster is square to the screen. With one hand still behind your back, carefully snug the yoke.
28. Complete the installation by relocking the adjustments to the PC board with fresh sealant.
29. Replace the top and the back cover. You now have a bigscreen WYSIWYG Macintosh display.
One final note, as mentioned earlier in this chapter, when the XL Screen Kit is used with the Lisa's light duty 1.2-A power supply (Apple Part# 6206103), audible transformer ringing may result, horizontal retrace lines may become noticeable, and a slight screen flicker may be introduced. The fix is to install the Lisa's heavy-duty 1.8-A power supply (Apple Part# 699-0189).
Summary
Despite the implication, an XL Screen Kit is not something you buy to turn a Lisa into a Mac XL. It's something you buy to turn Lisas and Mac XL's into WYSIWYG big-screen Macintoshes. Combined with an 800K disk drive upgrade, the result is a big-screen 1024K Macintosh. Combined with a SCSI card, the result is a big-screen Macintosh Plus. Combined with an internal hard drive, the result is a big-screen Macintosh SE. Add on an accelerator card, and what you've got is somewhere between a Macintosh SE and the